In the first blog about AESA's drawing workshop I discussed blind contour drawing. In this entry we'll be looking at ways to better understand the human body and how it moves. During the workshop the participants explored gesture drawing.
A gesture drawing is work of art that is done rapidly. In terms of figure drawing, it means that the artist is concerned with capturing the essence of the pose. During the workshop participants drew a series of poses in a short amount of time, ranging from as little as 30 seconds to as long as 2 minutes. Creating gesture drawings allow an artist to capture poses that cannot be held by a model long enough for a detailed study. As well, this practice reinforces the importance of movement and action which can be overlooked during a longer drawing session. Below are examples of gesture drawings done during the workshop.
The primary purpose of gesture drawing is to help artists understand how the human body moves. Gesture drawings allow you to focus on the effects of twisting on the body, the exertions of muscles, and the natural range of motion in the joints. By making gesture drawing a regular warm up exercise, your students will develop an instinctive understanding of human body proportions which will help them when they go to create more elaborate drawings.
Try This Trick
Having students mimic a model's pose for a few minutes before drawing also helps them to physically understand how the model's body is in tension.
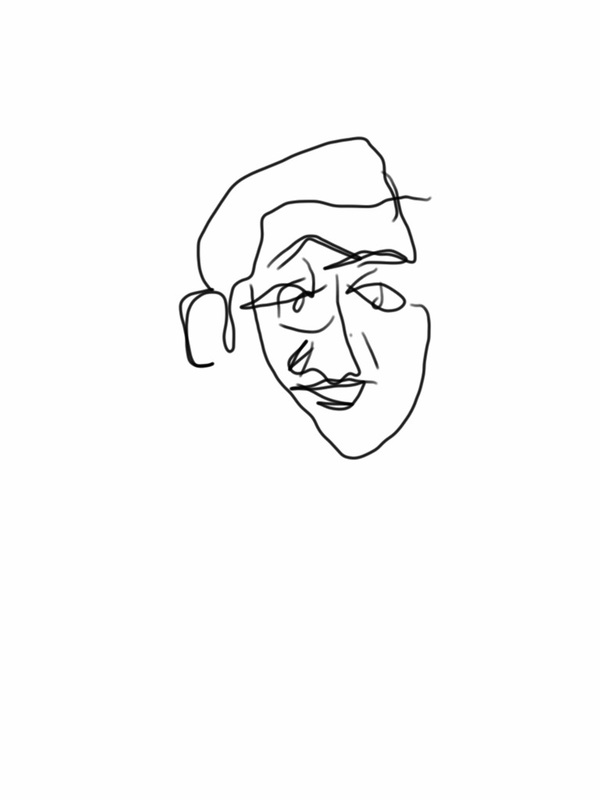
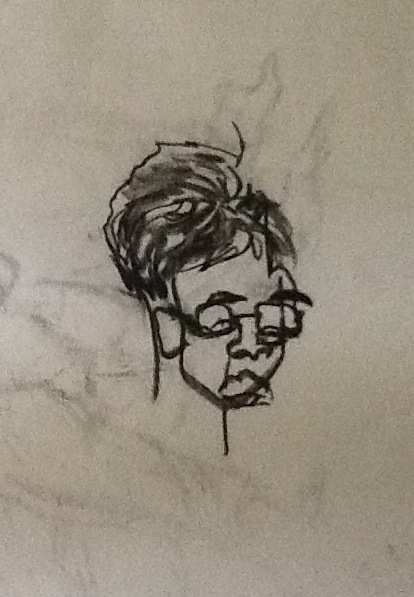
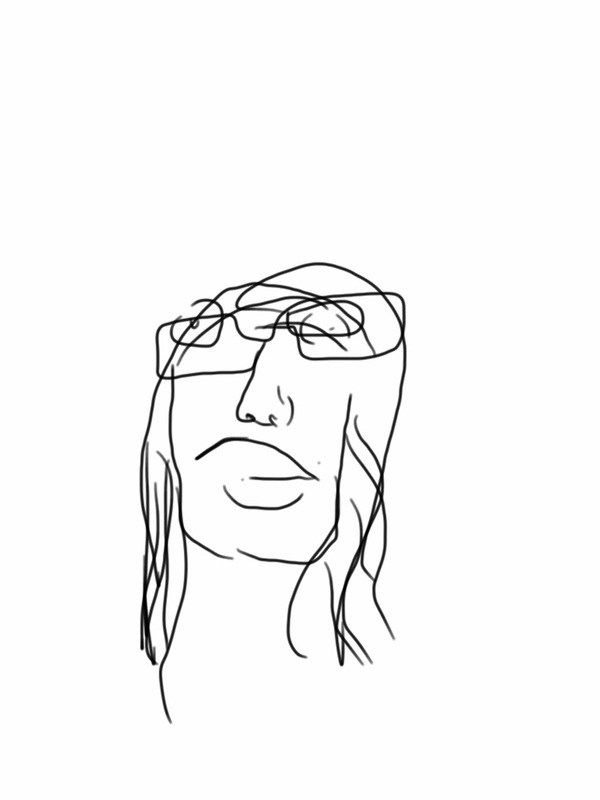
As promised here is a more detailed blog on some of the activities that were done during AESA's Beginners Drawing Workshop. The workshop began with an exploration of blind contour drawing. Blind contour is a method of drawing that involves drawing the contour of your subject while not looking at your paper. For the workshop each participant found a partner and had 5 minutes to draw their partner's face. The key to blind contour drawing is to draw one continous line in a slow and steady manner without lifting your pencil from the paper. While the drawings produced may seem more akin to scribbles, blind contour drawing does help students to draw more realistically, since it trains students to focus on all the details of their subject. I have also found that blind contour drawings are full of character, can be a good classroom icebreaker, and can ease students' anxiety of not being able to draw realistically.
Below are a few examples of blind contour drawings - including the one I did at the AESA workshop.
_
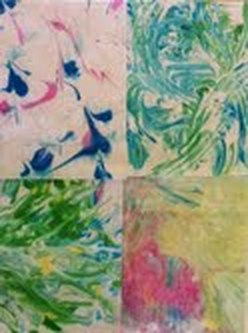
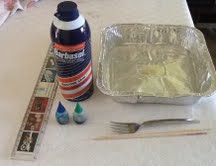
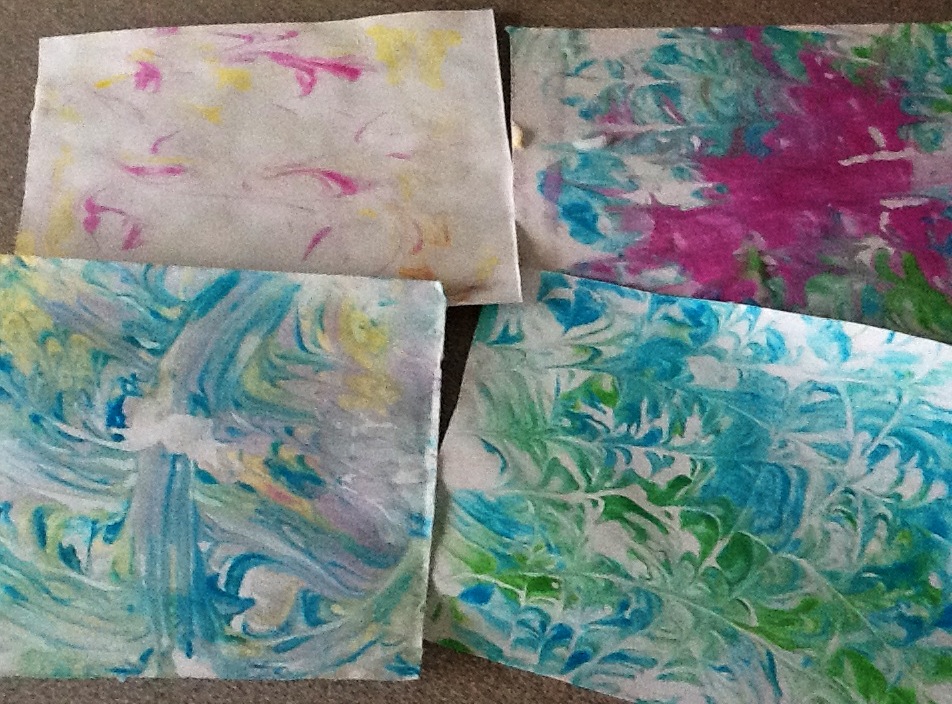
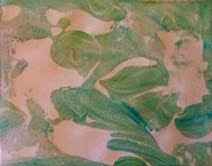
Paper marbling has a long history in Asia, the Middle East, and Europe. Part of its appeal is that each print is a unique monotype. While there are many methods to creating marbled paper, using shaving cream provides an inexpensive and accessible process that is appropriate for all ages.
_Materials- Shaving cream- buy the foam kind, not gel
- Aluminium baking trays
- Paper or Cardstock that is narrower than the squeegee and cut to fit the tray-computer paper works well and is cheap
- Squeegees, rulers, or long pieces of cardboard
- Watered down Tempera Paint in 2-4 colours
- Liquid Food colouring in 2-4 colours
- Wooden skewers, toothpicks, chopsticks, forks
- Rags, or paper towel for clean up
Directions
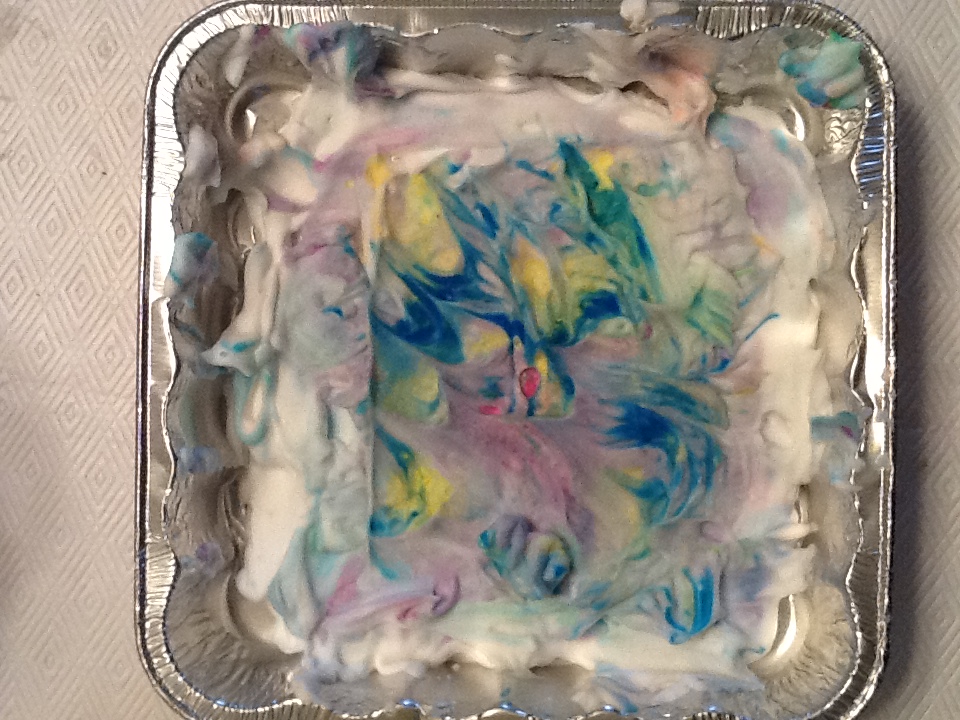
1. Apply a small amount of shaving cream to the tray. Use the squeegee to create an even layer that is a little wider than your paper and about 1/4 " thick.
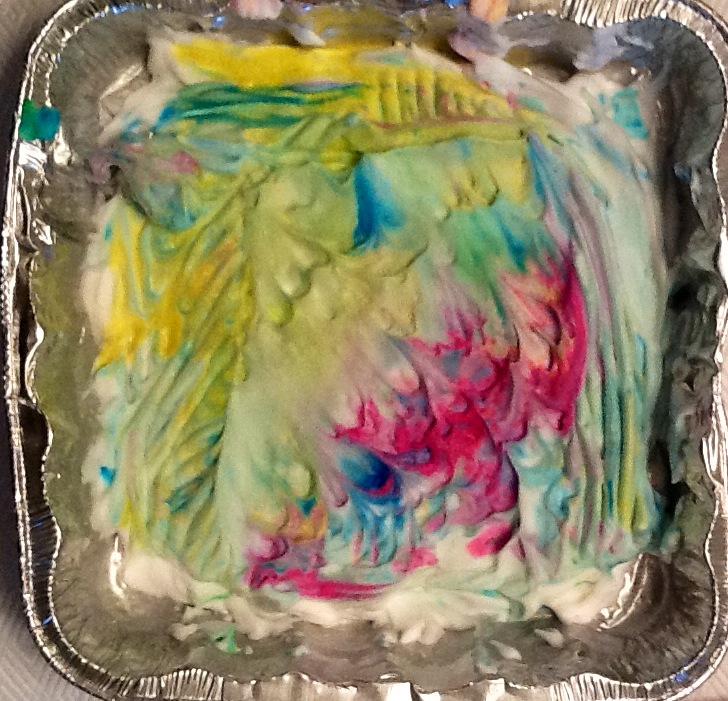
2. Evenly space 1 drop of each of the food colours or paint colours onto the layer of shaving cream.
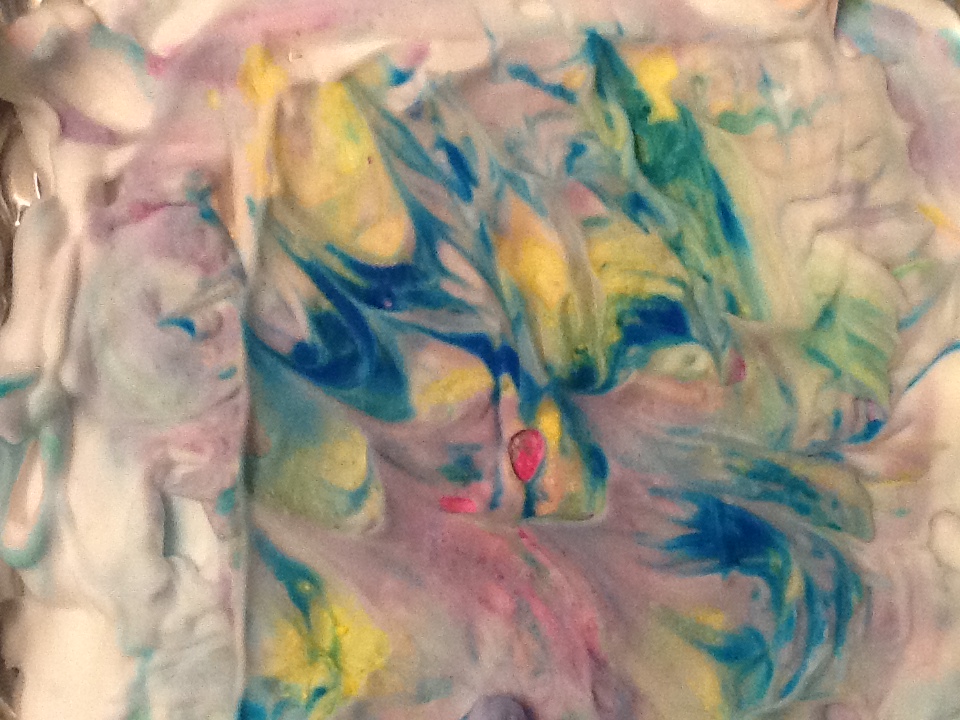
3. Use a fork, toothpick, or other utensil to swirl the colours, spreading the colour out in streaks across the shaving cream.
4. Once you are happy with the design, lay the paper on the shaving cream and gently press to make sure it makes contact with the coloured areas.
5. Peel the paper off of the shaving cream and lay it on a clean surface.
6. Scrape the squeegee or the edge of a ruler across the paper to remove the shaving cream while leaving the colour behind.
7. Set the paper aside to dry and use a rag or paper towel to clean off the squeegee.
8. Repeat the process, but be aware that over swirling will cause the colours to become muddy.
| 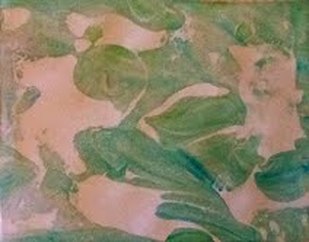 Have fun experimenting with different techniques. For this pattern I made holes in the shaving cream to create the areas of white. |
With the upcoming The Lorax movie, I thought I'd share the Dr. Seuss One Fish Two Fish figurine project done at the AESA Beyond Crayons and Construction Paper workshop. Scroll through the photos for step by step instructions.
One way to start or finish your lesson is to discuss artist quotes. Quotes can be a great way to spark a discussion not only about the artist and their time, but also how your students feel about their own art making process.
Artist quotes can also be a good way to introduce using descriptive language in an English class, or as an introduction to a specific time period in a Social Studies class.
See if you can match the quote to the artist.
Edvard Munch
Pablo Picasso
Georgia O'Keeffe
Jackson Pollock
Paul Gauguin
Emily Carr
Edgar Degas
Henri Matisse | "I found I could say things with color and shapes that I couldn't say any other way--things I had no words for"
"Only when he no longer knows what he is doing does the painter do good things"
"The painting has a life of its own. I try to let it come through"
"Creativity takes courage"
"I sat staring, staring, staring - half lost, learning a new language or rather the same language in a different dialect"
"I shut my eyes in order to see"
"Painting is just another way of keeping a diary"
"I sense a scream passing through nature. I painted ... the clouds as actual blood. The colour shrieked"
_ |
What is your favourite artist quote?
If you think that doing art based lessons in your classroom requires expensive materials think again!
For this lesson the materials are basic and require little technical know how.
This is the first entry in my 1 lesson/3 ways series. In this lesson I offer ideas on how to adapt a stained glass window activity for K-12 students.
Materials
- black construction paper
- rulers
- white or other light colored pencil crayons
- scissors or x-acto Knives
- tissue paper-in white and a variety of colors
- glue sticks
- double sided tape
- paint brushes
- acrylic paint in a variety of colors
- water
Choose from the sections below for the lesson that suits your students. High School
Students
- Start by introducing students to making stained glass windows using the basic information under Elementary School Students.
- At this age students can use a x-acto knife to create more intricately detailed designs
- Instead of folding the two sheets of black construction paper in half, have students use double sided tape to keep the two sheets aligned while they cut out their image.
- Consider sharing examples of modern artists who use stained glass.
| Middle School
Students
- Start by introducing students to making stained glass windows using the information under Elementary School Students.
- After your students have become familiar with creating stained glass windows have them try to move beyond simple geometric shapes.
- Students need to create images that are symmetrical since they cut through both sides of the black construction paper.
- Have students sketch their designs before beginning their windows
- As students cut out their shapes, have them periodically open the construction paper to make any adjustments.
- Consider including historical information about stained glass windows. For example in Western Europe stained glass windows constitute the major form of pictorial art to have survived the Middle Ages.
| Elementary School Students
- Start by folding together two pieces of black construction paper in half vertically.
- With both sheets still folded use a white pencil crayon to draw a line the width of a ruler on the 3 unfolded sides of one of the sheets. This will form the border of the window.
- Next draw geometric shapes that intersect the folded edge. Make sure to leave 1/2 inch of space between shapes to create a border around each.
- Mark each shape with an X so you can keep track of what to cut.
- Using scissors carefully cut out each shape, cutting through both sheets of construction paper.
- You can use double sided tape to help keep the paper aligned so that your design stays symmetrical.
- After cutting all the shapes, unfold the pieces of construction paper.
- Choose a variety of coloured tissue paper for each shape.
- You can either trace the shapes lightly onto the tissue paper and then cut the paper slightly larger to glue it onto the construction paper OR cut the tissue paper to the approximate size of the shape and trim off the excess after it is glued down.
- Once each piece of tissue has be glued onto one of the pieces of construction paper, run the glue stick over each of the borders and sandwich the two sheets together.
|
_Variation: Create your own colours
Flip through the images to learn how to make multicoloured tissue paper
Tips and Tricks
Layer sheets of one colour to create a more vibrant shade
Depending on your students you may want to pre cut some designs and tissue paper
Laminate your finished piece to make it sturdy
_Recently AESA was asked to participate in EDSA's first annual conference. During the conference we created a collaborative patchwork mural where all education students could show off their artistic talents. While our resulting image was of a Tom Thompson forest scene, collaborative murals can be useful for any subject matter. For science, why not create a mural on the human body where each student is responsible for representing and sharing information about a different organ. For social studies, students could create a patchwork map showing their interpretation of a specific place. Most importantly, collaborative murals can be a great way to develop a sense of community in your classroom, and even within the entire school.
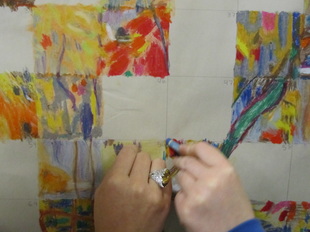
Feeling inspired? A step by step guide to creating collaborative murals can be found on our resources page.


 RSS Feed